Today, I’m going to show you around my kitchen, and share with you how I used 3D printing to improve it considerably.
Background & Challenge Philosophy
As with every article, I want to give a little bit of background, and set the philosophy I’m going to use for this challenge.
So, as you can probably relate to, this isn’t the first time I’ve tried to get organized. But generally, whenever my wife or I “organize” a cabinet, especially one that everyone in the family uses, it usually takes about a week to become messy again.
I’ve come to realize that any organization system that leaves “wiggle room” for putting things back incorrectly is basically worthless… especially in a household with children and sleep-deprived adults. This, ultimately, is why generic organizers like the kind you find at IKEA don’t actually help you stay organized… and why a solution like Gridfinity or the honeycomb wall is so incredible. If something ONLY fits in its proper spot… well.. you don’t have any choice but to put it away properly. And by the way, just the fact that something is 3D printed doesn’t inherently make it better… because even when I’ve 3D printed organization solutions around the house, I’ve learned the hard way that if they’re too generic and flexible, I end up just tossing stuff wherever there’s room.
So, as we go about this challenge I’m going to try to apply these principles wherever I can:
First, a place for everything, and everything should only fit in it’s place. No more generic storage that I’m just going to make a mess of in a week.
Second, accessibility and ergonomics over maximizing storage. In other words, we’re optimizing for comfort and pragmatism: having the things we use the most be easily accessible where and when we need them… even if it means “wasting” storage space.
And finally, because I know that most of you don’t have 15 3D Printers or a filament sponsor, I’m going to placing a priority on efficiency, both in terms of print time, and in terms of material used. No printing solutions that needlessly use 1kg of filament to store a few chotchke’s when a 100g print would do just as well.
With those criteria set, let’s dive in.
Coffee & Tea
Let’s start off our tour with the most important part of any kitchen: the caffeine sources, Coffee and Tea. One of the things I hated with our existing solution was that I never actually knew what we had, or how much of it, because there was no rhyme or reason to how things were stored.
The first thing I did, then, was add an additional shelf to one of our under-used cabinets above the water bar and coffee machine… but I intentionally didn’t make it run the entire depth of the cabinet.
From there, I transferred all the “large” quantities of things into these glass jars to keep Coffee, Yerba Mate, and so on air-tight. This is one of the reasons having an additional shelf was so useful.
Then, it was time to get to 3D Printing… and fortunately, Sovol was kind enough to send over a dozen or so kilos of their white and black PLA, which I used for almost everything throughout this project. For the various tea’s, hot cocoa, and so on, I found this awesome model which not only dispenses the packets, but also displays them. This is great because it’s much more organized, much more convenient, and also makes it easy to know when you’re running low on something. They’re supposed to snap together, but the attachment isn’t that strong. No matter, though, because I ended up just hot-gluing them to the cabinet door anyways. Plus, for smaller or larger packets, I scaled the design up or down, which was easy and convenient. Finally, for my sweetener dispenser, I designed a mount which allows me to dispense the Stevia through a hole in the bottom, or easily lift it up if I prefer to bring the dispenser to my coffee cup.
Now, you might think that this is really wasteful, because it doesn’t make use of the storage behind all the jars, but actually, what I’ve done is take each type of beverage preparation device, and put it behind the jar that you’d use it with – and which you’d already have to take out if you’re planning to use that device. To be honest, we don’t really use these devices, because we generally use tea-bags or the espresso machine, but if, say, I want a Moka pot or a coffee grinder, it’s hiding behind the coffee beans, and if you want a tea pot, those are behind the various loose-leaf teas.
Also, before we move on, I’ll share one of the secret features of doing things this way – and another reason I intentionally indented that shelf. It’s impractical and unreasonable to assume that people are always going to put the jars back exactly flush… right? Well, fortunately, they don’t have to. I’ve lined it up so that whenever you close the cabinet door, it pushes the jars all the way back, in one, aesthetically-pleasing line, so they look great the next time you open them up.
Bottles & Glassware
With that victory under our belt, it was time to move on to various beverage receptacles such as bottles and glassware, and let me tell you, this cabinet REALLY needed it. Things were all mixed up, we had dozens of bottles, half of which didn’t even have lids anymore… it was a mess.
For weeks I pondered how I was going to do this without wasting a ton of filament, but eventually, I found this great model – link in the description for all of the models I’m featuring, by the way – which is ingenious for a few different reasons. First, it makes use of a clever, modular design, so that you can print it on even a small printer like a Voron V0, and use wooden dowels if you want to save filament… though I preferred to use these very clever printed ones that print lying down. Second, the design is stackable, so you can print 8 of them at once and then crack them apart… which is WAY more time efficient than clearing and printing them one by one.
With these printed out, I began assembling, and because the fit wasn’t that tight on the leaves, I did decide to add a dab of 3D Gloop to each one as I put it together. Then, I headed over to the cabinet, and started ditching bottles without lids, and organizing the rest of them by theme or type. I also took the opportunity to move the glassware, which we rarely ever use, to the top shelf. Then, I organized all the drinking glasses into clearly-defined columns. So far, this has been sufficient to maintain order, and nobody has put any glasses back incorrectly… but if they do, I’ve already decided that I’m going to print a kind of “template” on the bottom front of the cabinet to show what goes where.
Then, I took a step back, and decided that I liked this bottle rack SO much… I was going to print another one just for the kids’ water bottles.
Now, I know what you might be thinking: this is incredibly wasteful, because I’m not utilizing the space behind the bottle rack. But remember: that’s not what we’re optimizing for. My problem isn’t storage space; I have 80cm deep cabinets… so deep that my wife can’t even reach the back here without a stepstool. My issue is organization. If everything is properly organized… we have MORE than enough space to waste.
Utensils
Up next, we’re going to take a look at the Utensil drawers. You might notice that I haven’t done any kind of printing for these two big cabinets… full of things like tupperware, snacks, cookware, and so on. Instead, I just went about clearing them out, moving things into more appropriate locations within the kitchen, and organizing them without any kind of organizers. This isn’t because I don’t plan to… after all, like I said before, if it’s possible to just “throw stuff in,” it’s only a matter of time until things become a disaster in there once again. It’s just that I haven’t figured out exactly how I want to best organize each of these cabinets. So if you have suggestions for different models I should check out, please share them either in the comments or in the #models-and-bottles channel on our discord server… and, if you’d like to see me do a Part 2 of this video once I tackle that challenge, let me know with a “Like” and a comment down below.
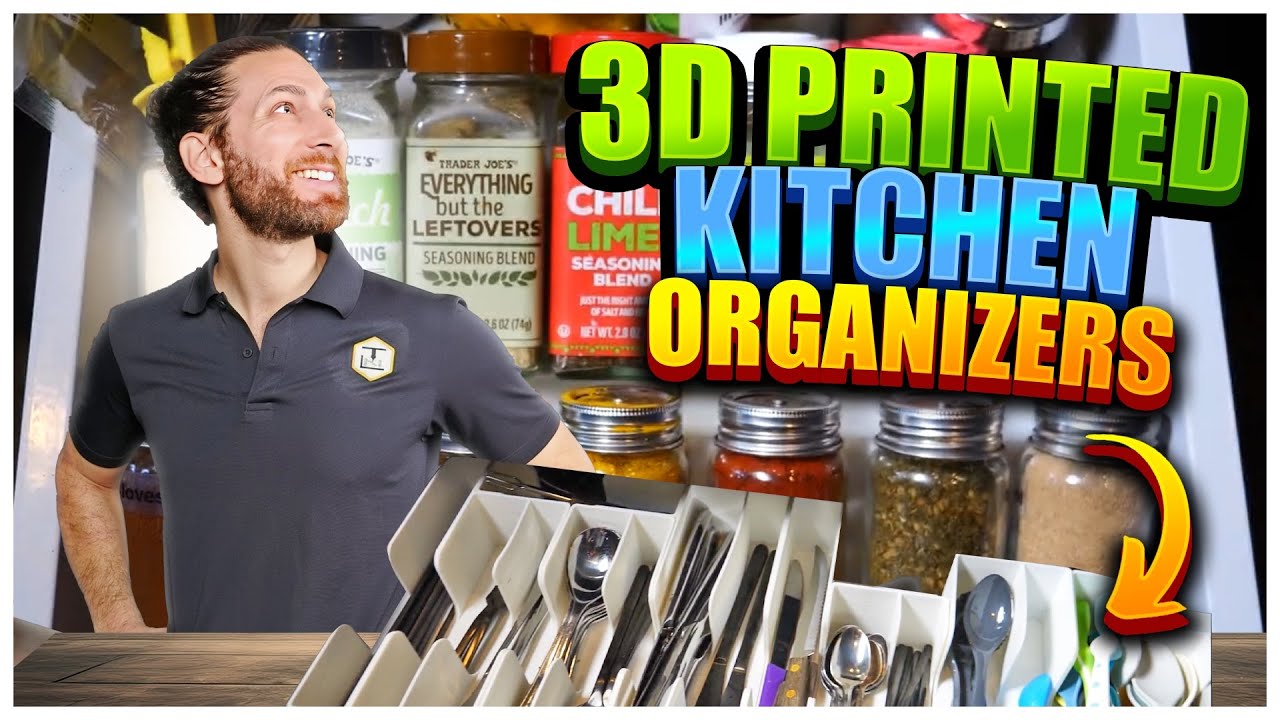
Anyways, while I think about all of that, let’s now take a look at our utensil drawers, because these are a common area of disaster-mess, and a place where generic organizers really fall short. For this, I decided to organize my own, modular system based on Gridfinity. It features thick, rugged walls that will survive repeated abuse, aesthetic curves that feel more appropriate in a kitchen, and tons of common sizes for forks, knives, chopsticks, cheese spreaders, you name it. I’ve even lined up the indentations between the bins, so that it’s easier to pull things out. And, for the things that are too big to print on your print bed, or where you want a custom size, I’ve created standalone “end caps” in different widths, as well as “blanks” that you can use to cover the frames down below. Using this system, you can create all kinds of custom arrangements, including extra long bins for rolling pins, Y-shaped pins for things like mallets or whisks, and much, much more. And of course, it’s compatible with the entire gridfinity ecosystem, so if you still want to mix and match with traditional gridfinity bins, lite gridfinity bins, or whatever… you’re more than welcome to!
This system has been working quite well for me in both of our utensil drawers, for all but the kids utensils, which someone keeps making a mess of. The housekeeper DID ask me for a tour of the cooking utensil side, so she’d understand what goes where, but otherwise, it’s been about a month, and we’re still looking pretty good… so I’d say that’s a job well done!
Spice Drawer
Up next, let’s talk about the spice drawer. For a while, I’ve been noodling on the best way to handle this unique challenge. Obviously, I could just print some kind of grid, or even just leave the spices in the drawer, with some uniform, glass jars… but that would necessitate always putting labels on the spices… even the ones that already come in nice glass drawers with fun labels.. and I don’t want to deal with that. Plus, it’s much easier to identify the spice you want if you can actually see it through the glass… But I didn’t want to just lay the spices flat, and take up so much space. It was a proper conundrum.
Fortunately, a quick search of Printables revealed this model… and it’s ingenious for a few different reasons. First of all, it’s basically a simple extrusion, so you can print a bunch of them standing up if you want to. Second, it’s modular, meaning that you can print a front piece, and then as many back pieces as you want, and they snap together. I would’ve liked to see a version that snapped the sides together, too, but if you’re planning to glue them to the drawer, that’s not a big deal. Third, it uses very, very little filament relative to the storage space it offers – much more efficient than, say, doing gridfinity bases below, and then putting some kind of slanted gridfinity bins to display. Why bother with all that filament below, when this simple solution will work just fine. I printed out a bunch of these, migrated a bunch of my spices from their ugly plastic containers to IKEA glass ones, and as you can see, they turned out great. I even left some space in the back for extra spices, or things like cloves, which don’t go well in dispensers.
I’m going to give it a month to see how well these IKEA containers keep out humidity, and if my spices chunk up, I’ll just design a TPU cap on top of these containers to seal things like garlic powder that don’t do well in a humid environment.
Medicine Drawer
After such a success with these containers in the spice rack, I then turned my attention to the Medicine Drawer, where I decided to use the same principle. Using Blender, because it’s easier for modifying meshes, I changed the dimensions and the angles of the design in order to accommodate larger supplement and vitamin bottles and better utilize the space. Here, I really wish I’d taken the time to create a connector system of some sort, because I tried to weld the plastic together, and it didn’t turn out very nicely. Nonetheless, you don’t see it when there are pill bottles there, and as you can see, this is MUCH more aesthetically pleasing than a drawer full of unidentified bottles. It’s also MUCH easier to find what I’m looking for at 3AM when my son is coughing up a lung.
In the back, I left space for 2 and a half Gridfinity bins, which does a nice job holding all of the angled bottle racks in place. I filled those gridfinity slots by generating a dozen or so custom Gridfinity bins in OpenScad, one for each type of blister pack we have on hand, and also some of the traditional “scoop” type bins for things like lozenges. I chose to do this all the way in the back, because it’s where I’ll stack up all of the different prescription and “harder” drugs, if you will, so that they’re well out of reach of my boys. Though, I’m also considering locking this drawer with one of those magnetic latches, or at least blocking off the front panel, so my youngest son can’t reach even the vitamins and kids’ medicines up front.
Countertop to Pantry
OK, so here is where I need a bit of your help. As I said, I didn’t really 3D print any solutions for the tupperware cabinets, or the drawers under the microwave and oven… I just organized them a bit. And then, I cut another partial-depth shelf, right here, which allowed me to clear off a TON of the stuff that was previously taking up so much space on the countertops, such as the fruit basket, various wipes, paper towels, salt and pepper, and so on… and move that into the pantry. So right now, I have a secret drawer that the kids don’t know about for sweets, in a side they never open, and then, in this last cabinet, I have a canned food drawer, a drawer for snacks I want the kids to have access to, the medicine drawer I showed you before… from the top, I have kind of “shabbat” stuff, dry foods like pasta etc, quick meal solutions like oatmeal or mac and cheese… and then, in the middle, it’s kind of just.. a shelf of overflow. There are some things here that don’t fit in a drawer, some medicines we use every day, creams and stuff for the kids… but I’m really not happy with the level of organization here, so I’d love if you shared models, again in the comments or on our discord, if you have suggestions. It might be cool to create some kind of customized solution, but, as any parent knows, the types of things we need change frequently based on whatever our kids are sick with that week… And by the way, I’m also not super happy with the level of organization in the snack drawer, either, but I just don’t know if it makes sense to create an organizer when the snacks we have in the house might change from week to week. Anyways, you guys are always great about suggestions, and I read all of your comments… so let me know what to do.
Fridge
OK, before I let you guys go, it wouldn’t be an MTV cribs style video without a look inside the fridge, although that’s another part of the kitchen that’s still CLEARLY a work in progress. But… there are at least two cool 3D prints in there I want to share…
So, I’m a big hot-sauce freak, and I love collecting hot-sauces and sauces in general. I thought about printing this dolly for them, but, it kind of seemed overkill, and a lot of work to assemble. So instead, I free’d up the top door shelves for traditional hot-sauces on one side, and different kinds of spicy stuff on the other. Then, below, we have “general sauces” here, cooking sauces here, and beverages here. However, tying up all the door shelves for sauces meant that there was no longer any room for the included egg trays, which kind of stink anyways, and don’t hold that many eggs. So instead, I printed this epic egg roller thing, which is great because it holds 15 eggs, and ensures that you’re always using the oldest eggs first.
Then, while I was on the “dispenser” kick, I printed out this drink dispenser, which I scaled – incorrectly, as you can see here from the pins – to be a red bull dispenser instead of regular cola cans. Fortunately, someone already made a ready-made Red Bull version since then, so I’ll link to that one in the description, too.
The rest of our fridge, honestly, isn’t that demanding to organize. We actually are very lucky to have a friend we pay to cook all our meals for us twice a week, so most of our fridge is ready-cooked food that shows up in easy-to-stack tupperware. The only other source of mess is the various things like cheese, jars, etc… which, I’m not sure how to better organize. In the past, I’ve tried labeling shelves, but nobody, including myself, pays attention to the labels when they’re in a rush, so I’m going to give this some more thought, and see if I can use 3D printing to solve this issue.
Outstanding Challenges
So that’s most of the disorder in my kitchen tackled, but I don’t want you to think I’m martha stewart over here, or thing that I’m anywhere NEAR done with this project… so I would like to point out some of the other outstanding challenges in case some of you out there know of a model that could help, or better yet, maybe I’ll give you an idea for a new model you can create. There are a lot of places I didn’t show you guys, because they either are intended to be “catch all” areas that we don’t care if they’re messy, or the nature of the stuff in the drawer just doesn’t let you put things away incorrectly. Like, you’d have to be a psychopath to not stack plates on top of the plates that look just like them, so nobody does that… and the pots and pans, well, there isn’t enough room in the drawers if you don’t put things away properly. So, those aren’t problems.
But there are nonetheless some outstanding challenges that I want to deal with. Take, for example, this whole slim drawer. Up top… this is a disaster. I don’t know what I should even put here? Right now it’s some plant related stuff, some wipes… Ugh.
And down here, there’s a bunch of cleaning chemicals. But it’s too crowded and messy… so I’d like to organize that, and maybe move some of these cleaning chemicals into the utility closet, which is WAY worse of a mess than any cabinet in the kitchen was.
Then, there’s this entire set of drawers, which aside from the top one, which is basically large bowls we rarely use, is totally under-utilized. Cat food for the cat we don’t have anymore up here, and 10,000 bags, half of which are junk, down here. So, I might just do some reworking of this… let me know if you have suggestions… but more importantly, let me know if you guys enjoyed this video, and would like to see a part 2, or maybe another video like it where I tackle another area of disarray in my house, such as my closet, to see how 3D printing can be of use there, as well.
