In this quick tutorial, I’m going to show you how you can create incredibly cool, intricate 3D designs with 0 design skills whatsoever, simply by taking advantage of a lesser-known trick in your slicing software.
How to Create 3D Prints by Removing Top and Bottom Layers
In my previous list of 50 useful things you didn’t know you could 3D print, I casually mentioned a couple of times that I’d removed top and bottom layers of a few designs in order to create something cool, and I was surprised when quite a few of you responded asking for clarification.
As I always say, I read every single comment, and I love requests – so I wanted to do just a quick tutorial to share this tip and explain for those of you who asked.
So, the basic idea is this:
Take any design, pull it into your slicer, and then, set the number of top layers to 0, and or, do the same for the bottom layers.
Now, why might you want to do this?
Well, there are a lot of reasons, and I can think of NO better way to demonstrate them then by sharing the story of my 3D printed computer stand shelf brackets.
Originally, when designing those brackets, I had tried to actually build in the honeycomb pattern using blender.
I’m sure there are better ways to do this, but I did it using patterns, boolean modifiers, and then painstakingly fixing the edges to remove loose geometry.
I spent hours (Double-digit numbers of hours) doing this, and then, I realized that I wasn’t happy with the design.
I wanted the honeycombs to be more dense, and I also wanted their wall thickness to be a multiple of my line width, so that printing wouldn’t take well into the next millennium.
This basically would’ve meant that I would have had to restart the entire project from scratch.
FORTUNATELY, I eventually landed on a better idea, as you can see with my “V3” design.
Instead of trying to design the actual honeycombs, I would let the slicer do the heavy lifting.
All I’d do would be design the outline of the shape I wanted, and THEN, I would import it into my slicer, where I could instead choose honeycomb infill, with 0 top and bottom layers, and then play around with the infill density to get the look I wanted.
I could even combine infill every other layer, saving a ton of time, and giving me a cool “striped” look inside, but not on the edges.
But this is just one of many examples, and just one potential infill pattern.
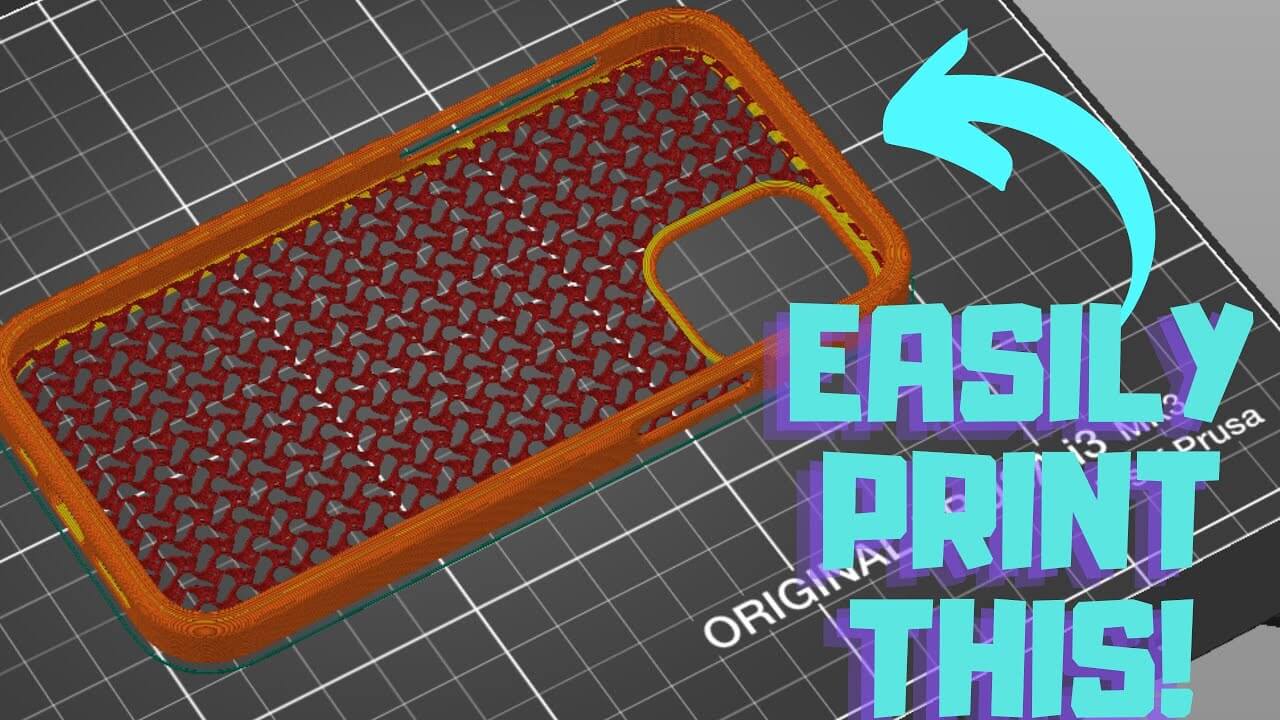
You could, for example, 3D Print some phone cases in flexible filament, and then remove top and bottom layers – or even just the bottom layer – to create a unique look – especially if you use something like gyroid infill.
I used this same technique to save filament and give my desk drawers a really cool look. And I’ve seen it done in a lot of beautiful designs such as this glasses holder by DennisP.
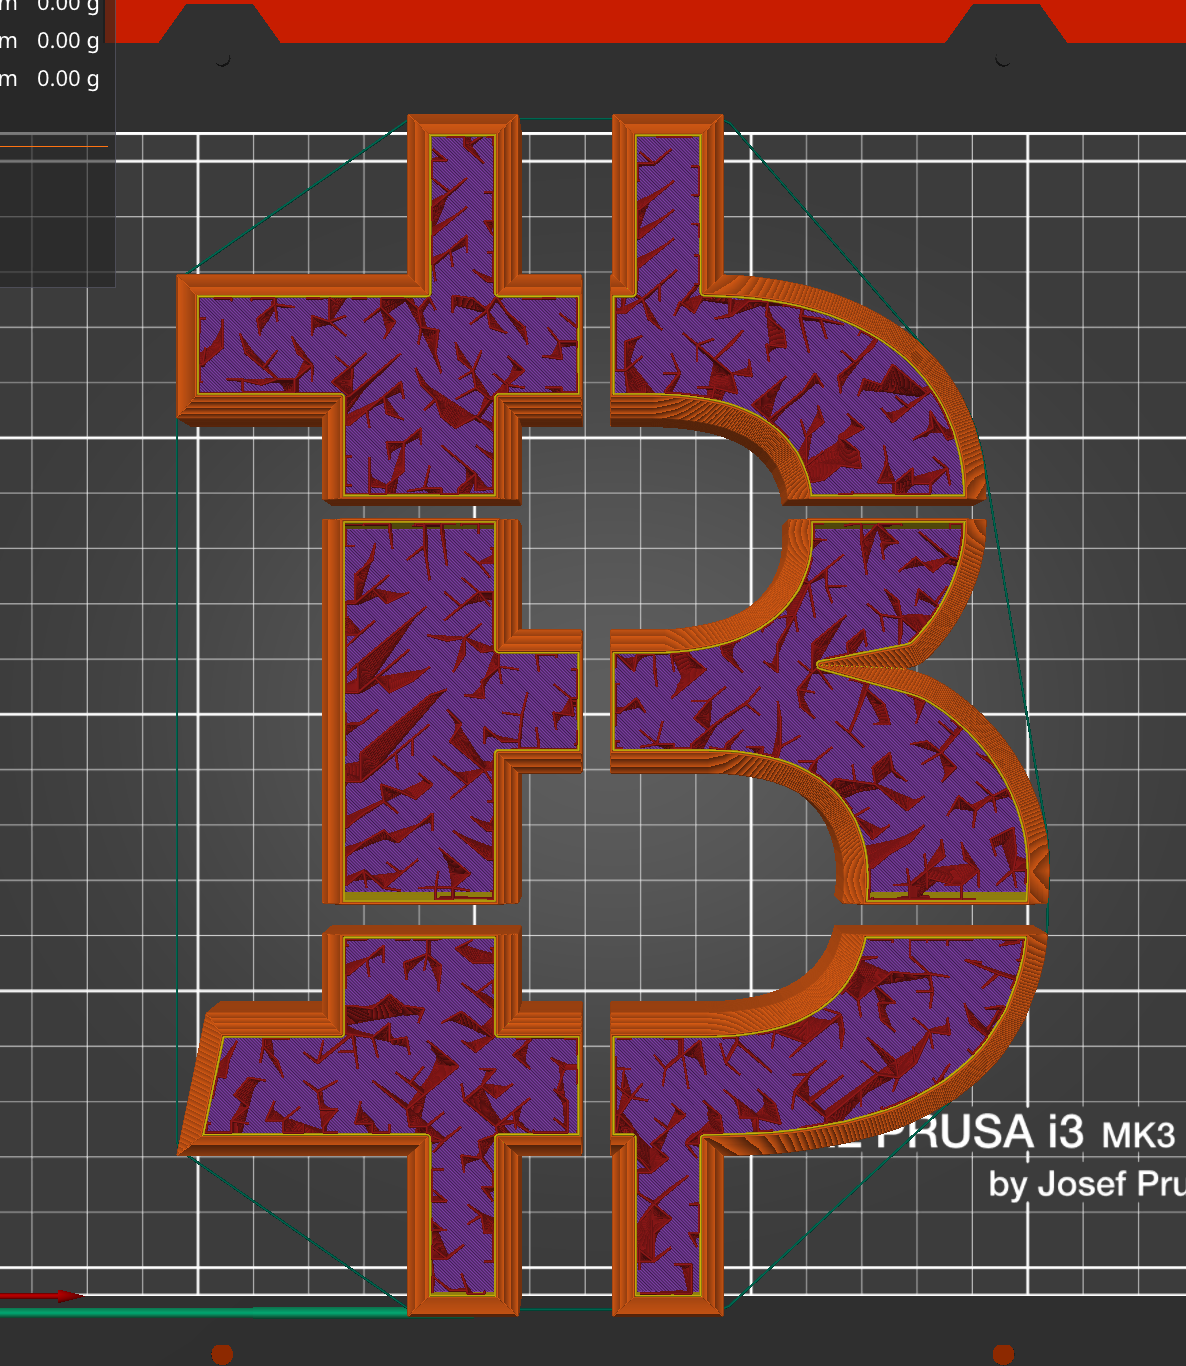
I even did a massive wall art installation of a Bitcoin logo, and in order to save weight and filament, I offered the client an option of about 10 different infill patterns and densities, as you can in the screenshots below:
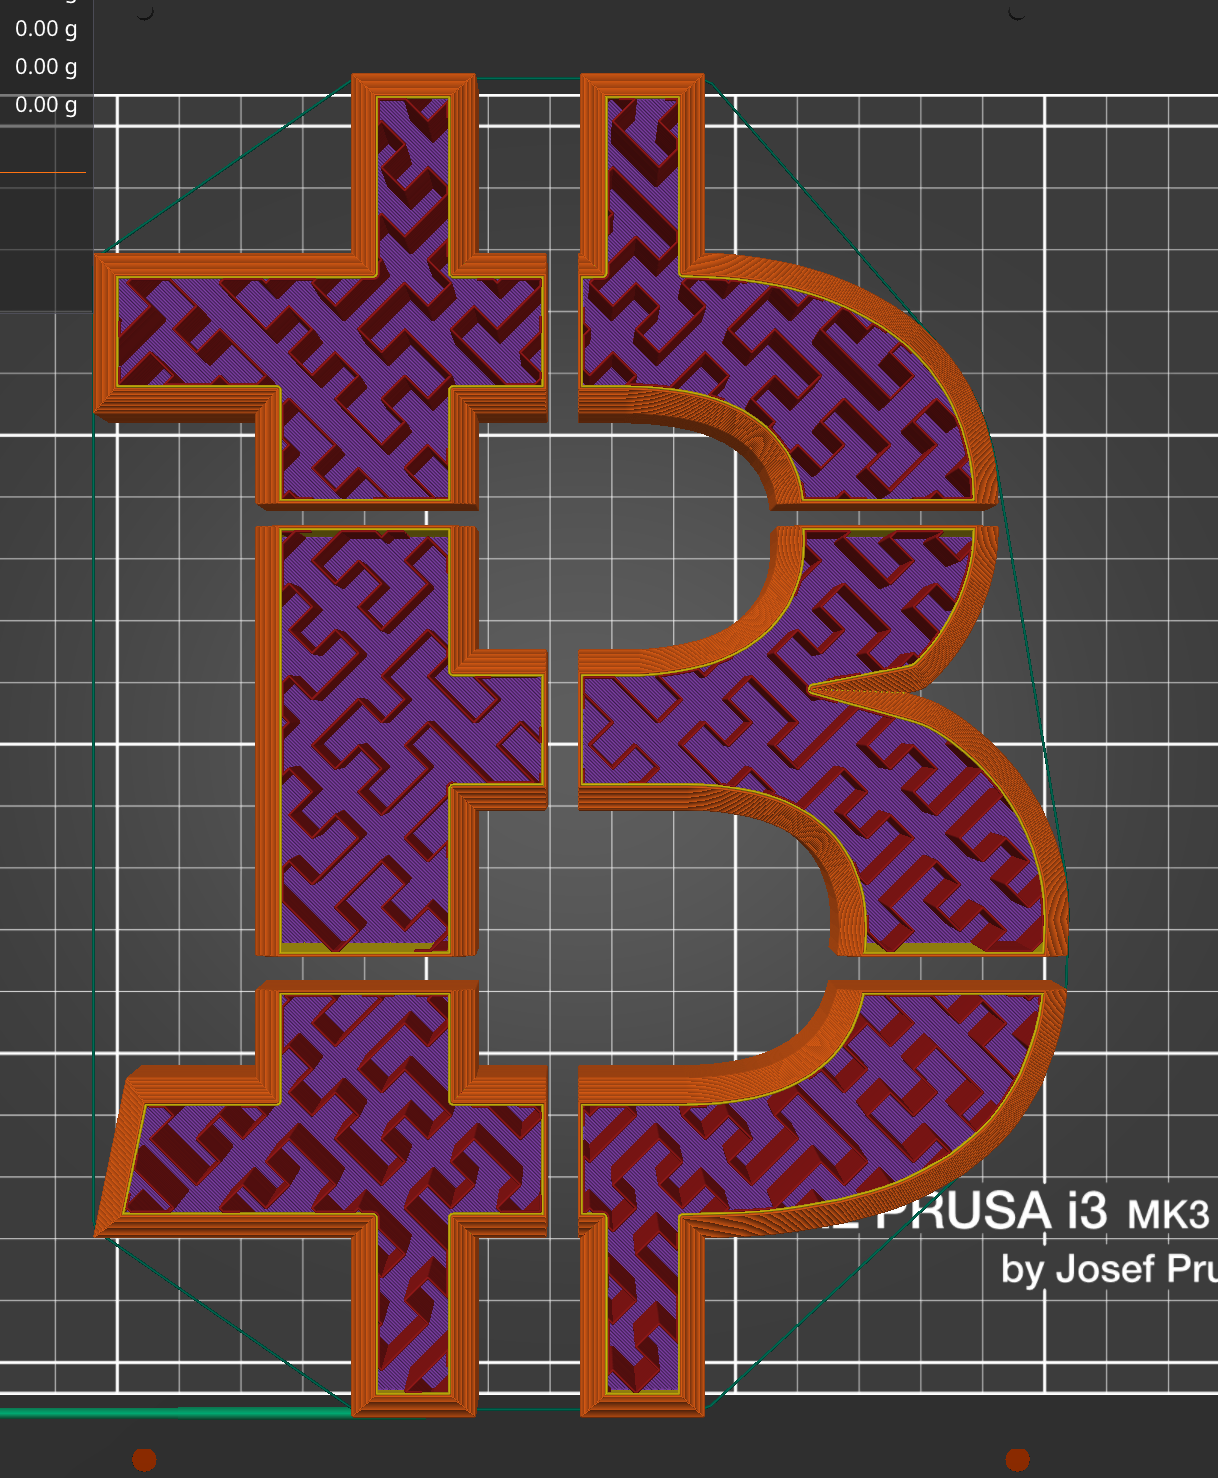
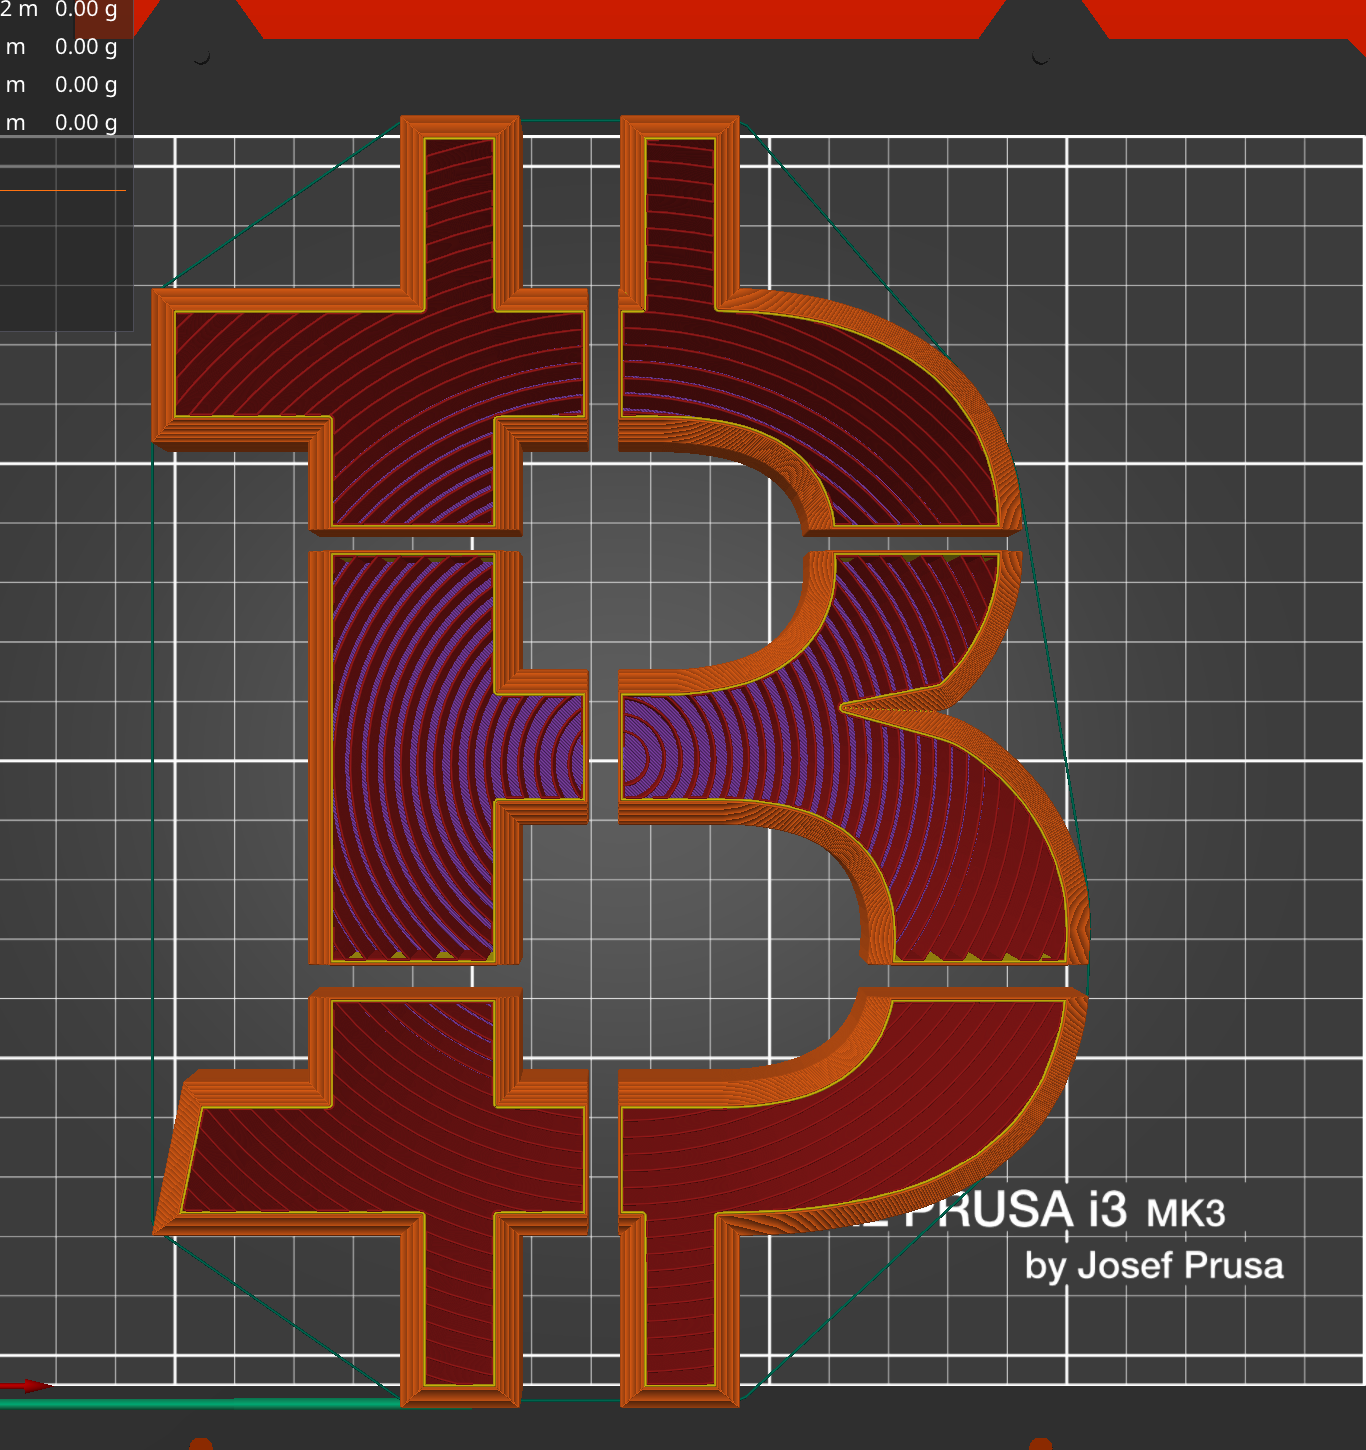
Here is how the end result looked like using a Hilbert Curve:


More 3D Design Ideas Without Top and Bottom Layers
How about making these simple coasters, which are nothing but a basic, rounded hexagon shape, imported into the slicer, and then sliced with no top layers. The little pockets catch condensation and prevent it from leaking on to the table, and there were no design skills necessary.
Or check out these cool ventilation covers, which, because they have gyroid infill, could literally never be made using any other process besides additive manufacturing.
I’ve even seen Stefan from CNC kitchen make his own siv using 3d printing, simply by using the add shape feature of his slicer, adding a cylinder, and removing top and bottom layers.
The sky is the limit with this concept, and remember, you have a lot of different infill patterns and densities to choose from and play with.
You can vary the number of perimeters to change the look of the border and how sturdy the print will be.
You could even try printing with no top layers, bottom layers, OR perimeters, for example if you wanted to make a cushioned surface, or just make a cool remix of a model you like.
I’d LOVE to see what you guys come up with, so share a link to your designs in the comments below!


Hi Jonathon,
Thanks for the tip. I never thought about this technique, but I am looking forwards to experimenting.
Seems like a good alternative to trying to achieve the elusive perfect shiny bottom.