
By far, one of the MOST practical and popular ways to use your 3D Printer is to create customized organization systems for all your various stuff.
In this guide, I’m going to pretend that my office isn’t a complete disaster anyways, and share a handful of my favorite systems for organizing EVERYTHING in your life, using 3D Printing.
I’ll also help you understand which systems are good for what, the various pros and cons of each, and what to look out for before you hit “print.”
Let’s dive in.
What Are My Top 3D Printed Organizer Systems?
Without further ado, here is my full list in a video form, followed by a written guide:
Modular Drawer Organizers
By wbu42
In a second, I’m going to show you how to take your drawers to the absolute next level when it comes to organizing small things or having custom-made nooks for everything, but first, I want to share this more “entry level” organizational system, which is ideal for sorting larger items, or items that you don’t anticipate rearranging while saving on filament as compared to the other systems we’re going to see.
This means that this particular system is ideal for things like cables, electronic equipment, silverware, and more. I’m talking about this modular drawer organizer system by wbu42.
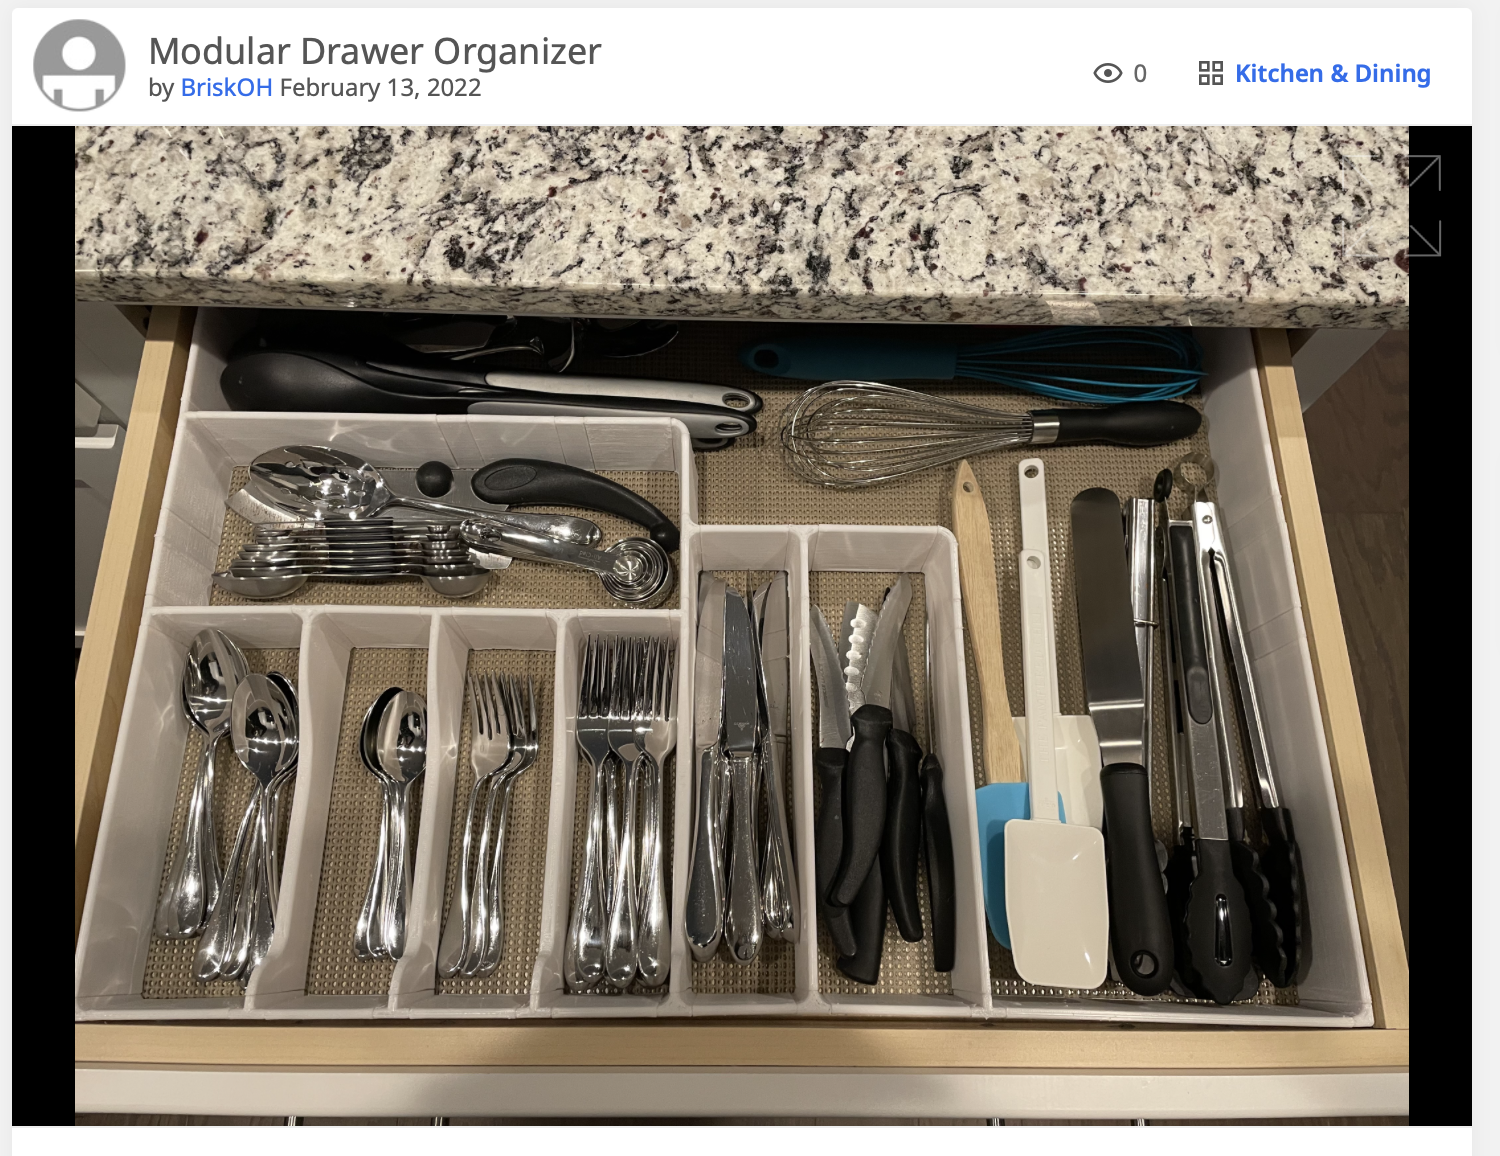
Like every one of the systems I’m going to be showing you, it’s fully customizable – this is, after all, 3D Printing we’re talking about, and if we wanted a one-size-fits-all solution, it would be much easier – and possibly cheaper – to just buy a generic one size fits all solution. But no, this is about customizing each slot to exactly what you plan to store there, with a tailor-made cubby.
To get started, you need to determine which profile you want – slanted, or simple rectangular inner pieces, and then, start measuring.
You can combine any variety of lengths, as well as 2, 3, or 4 direction joints, and even curved components. They even come in various heights – though you’ll want to choose one uniform height for the whole system, obviously.
And, as I mentioned, this system saves a ton of filament over all the others, because you’re printing only the walls, and none of the bottoms. That, however, does mean that you can’t just “lift” this organizer out, which is a major downside if you need to take multiple bins to other places.
What to watch out for: When printing this the first time, it can be really confusing and overwhelming to look at the long long list of files. I made the mistake of thinking that I needed to print the simple vertical ones only, – and that your entire outer perimeter will therefore most likely need to be out of the sloping ones.
The pro-tip here is really to take your time in selecting the files, and if needed, assemble them right on your build plate in the slicer software before hitting print.
I also thought that I would cut-corners, save filament, and do 1 perimeter wall prints for my kitchen, but they were so flimsy and wavy, that I ended up not using them at all which means that instead of SAVING a little bit of filament, I actually wasted a LOT of filament.
You can print these in 0.20mm layer heights if your printer is well tuned, but any higher than that, you’ll encounter a lot of friction when you try to slide together the pieces.
The All-Mighty Gridfinity
By Zack Freedman
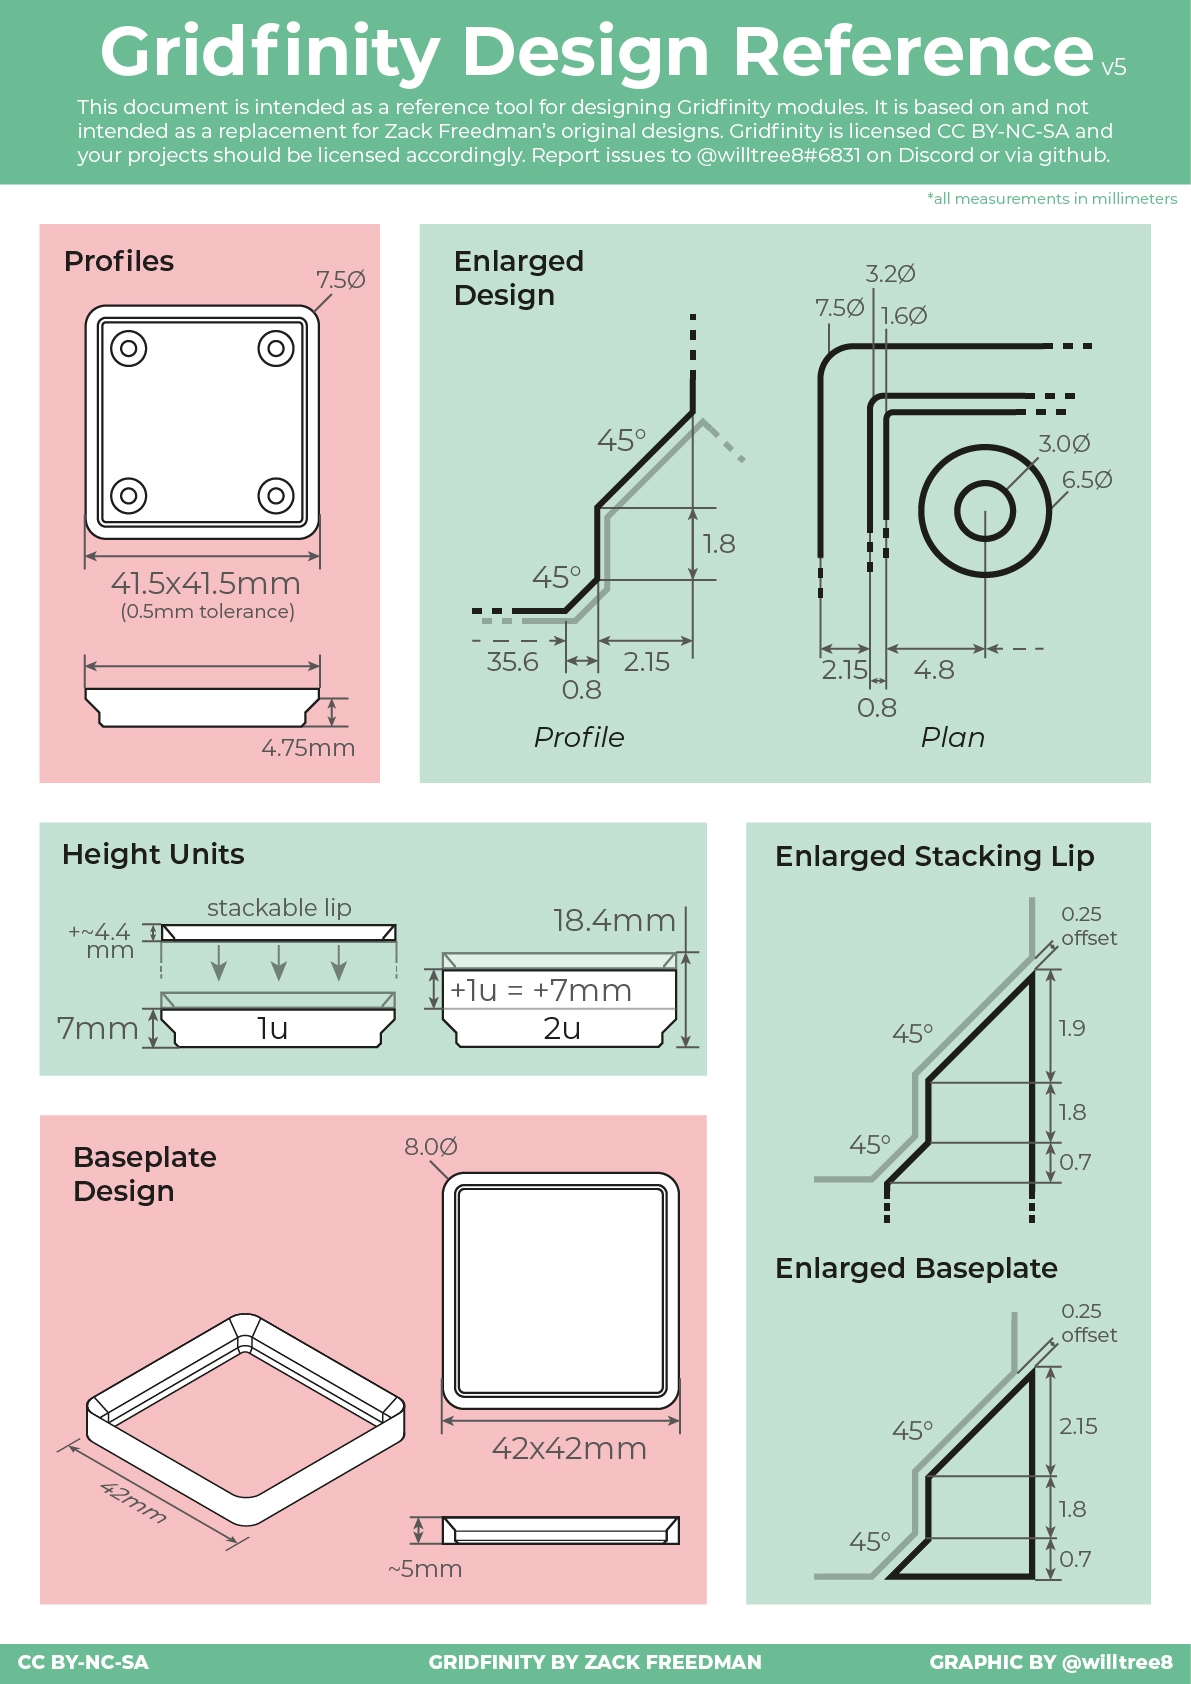
No discussion of organization and 3D printing would be complete without mentioning the all-mighty GRIDFINITY by Zack Freedman.
I love this system so much that the first video on my YouTube channel was actually an entire list of gridfinity tips, so if you haven’t already seen that video, do make sure to check it out in a new tab here.
For those of you who’ve never seen gridfinity before, oh man, I’m excited for you, because your life is literally about to change for the better.
Gridfinity is basically a free, open-source standard of 42x42mm bases and bins for anything and everything, which can use magnets to snap to one another, meaning that you can rearrange and relocate things to wherever you need them, whenever you need them.
Because these bins are fully enclosed, with very thin walls and generally very thick bottoms, they really do make more sense for organizing small things.
Sure, you can – and I have – printed massive bins to organize things as large as glue guns, hairdryers, and so on, but truthfully, because it’s so easy to just pick those things up, the ratio of marginal utility to filament spent is not great, especially when the thin walls split and so I’ve learned to use other systems on this list for storing the “bigger” stuff. More on that in a bit.
Since recording my first video, the community for gridfinity has really grown, with a website, Reddit community, Discord discussions, openscad templates to create your own models, and a huge explosion of ready-made models for just about everything you can think of, so much so that Thangs.com had to add an entire gridfinity section on their website!
One thing that I, personally, have changed in how I’m using gridfinity lately is that, due to space constraints, I’m really taking more advantage of the third dimension, and stacking bins wherever it makes sense, for example, putting longer sizes of the same bolt diameter below.
I’ve also been enjoying the benefits of having Gridfinity in numerous different locations. I have the bins in various places in my tool shed, next to my printers, in my drawers, and on my honeycomb storage wall..
Which leads me to:
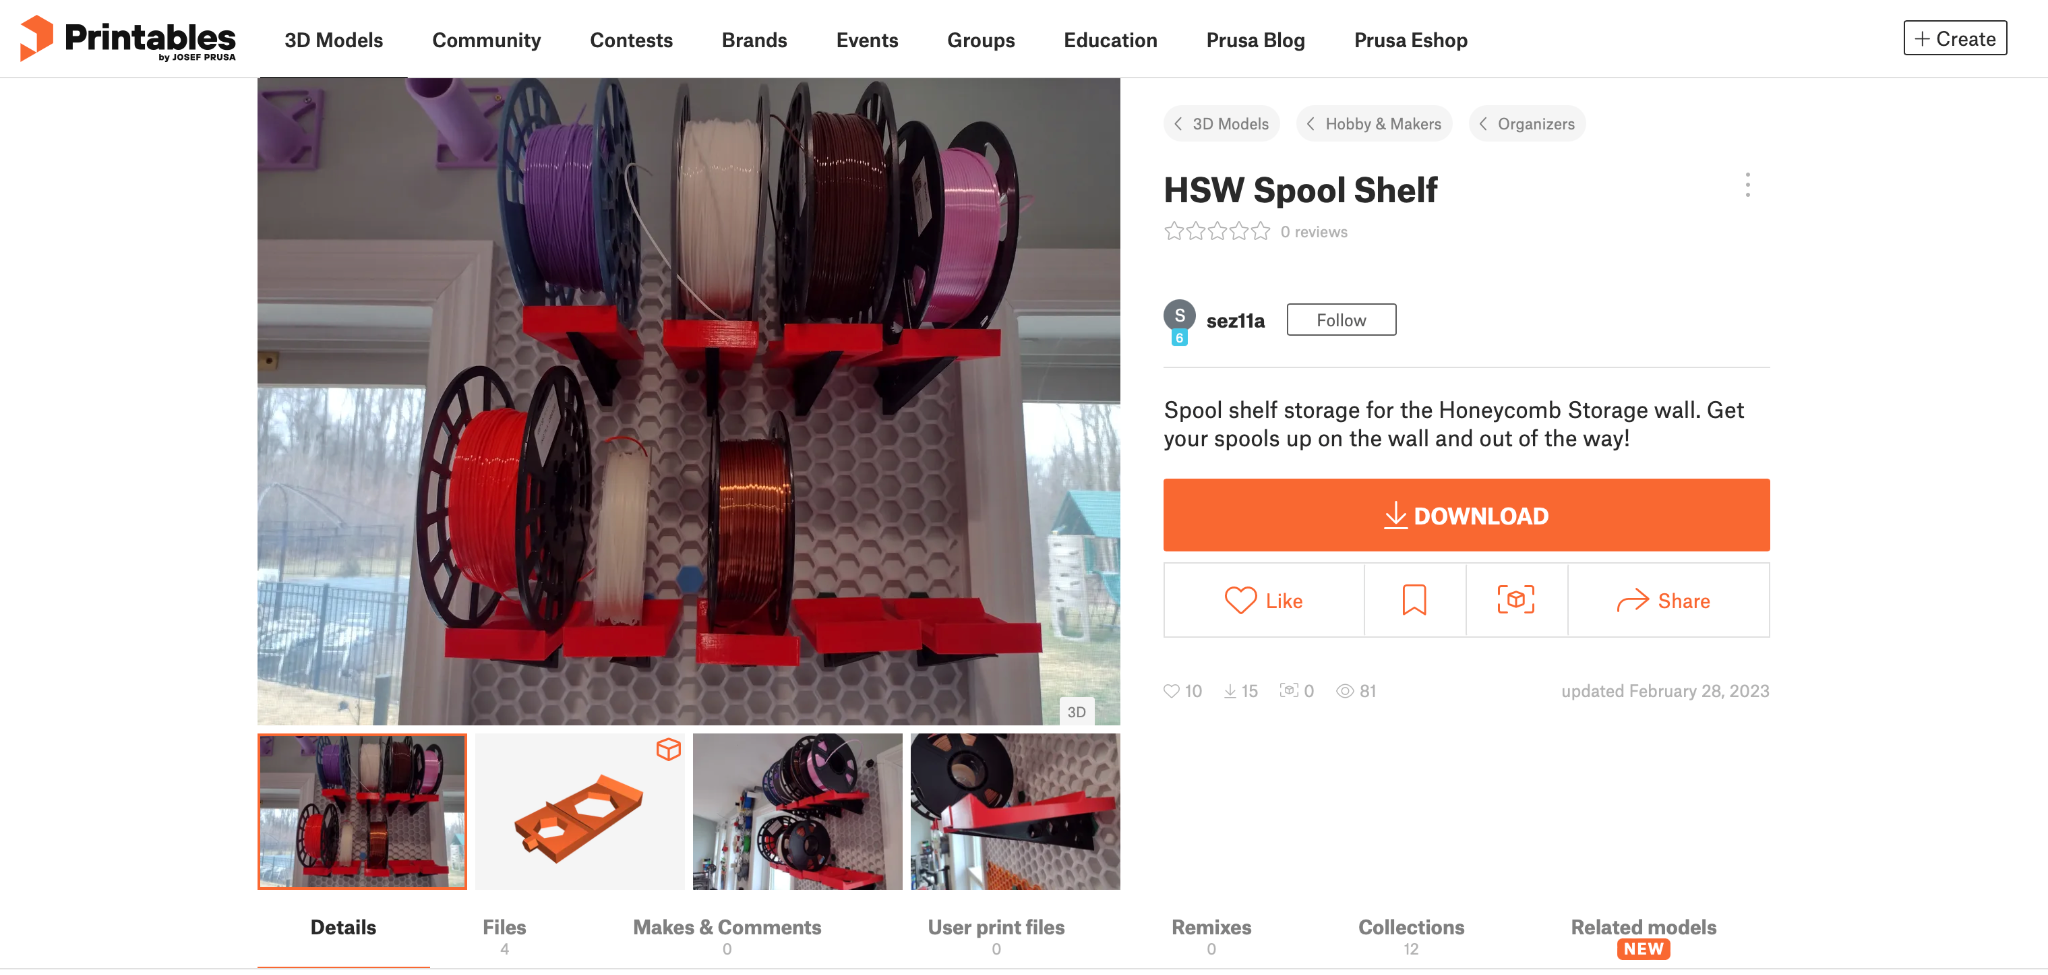
Honeycomb Storage Wall
By RostaP
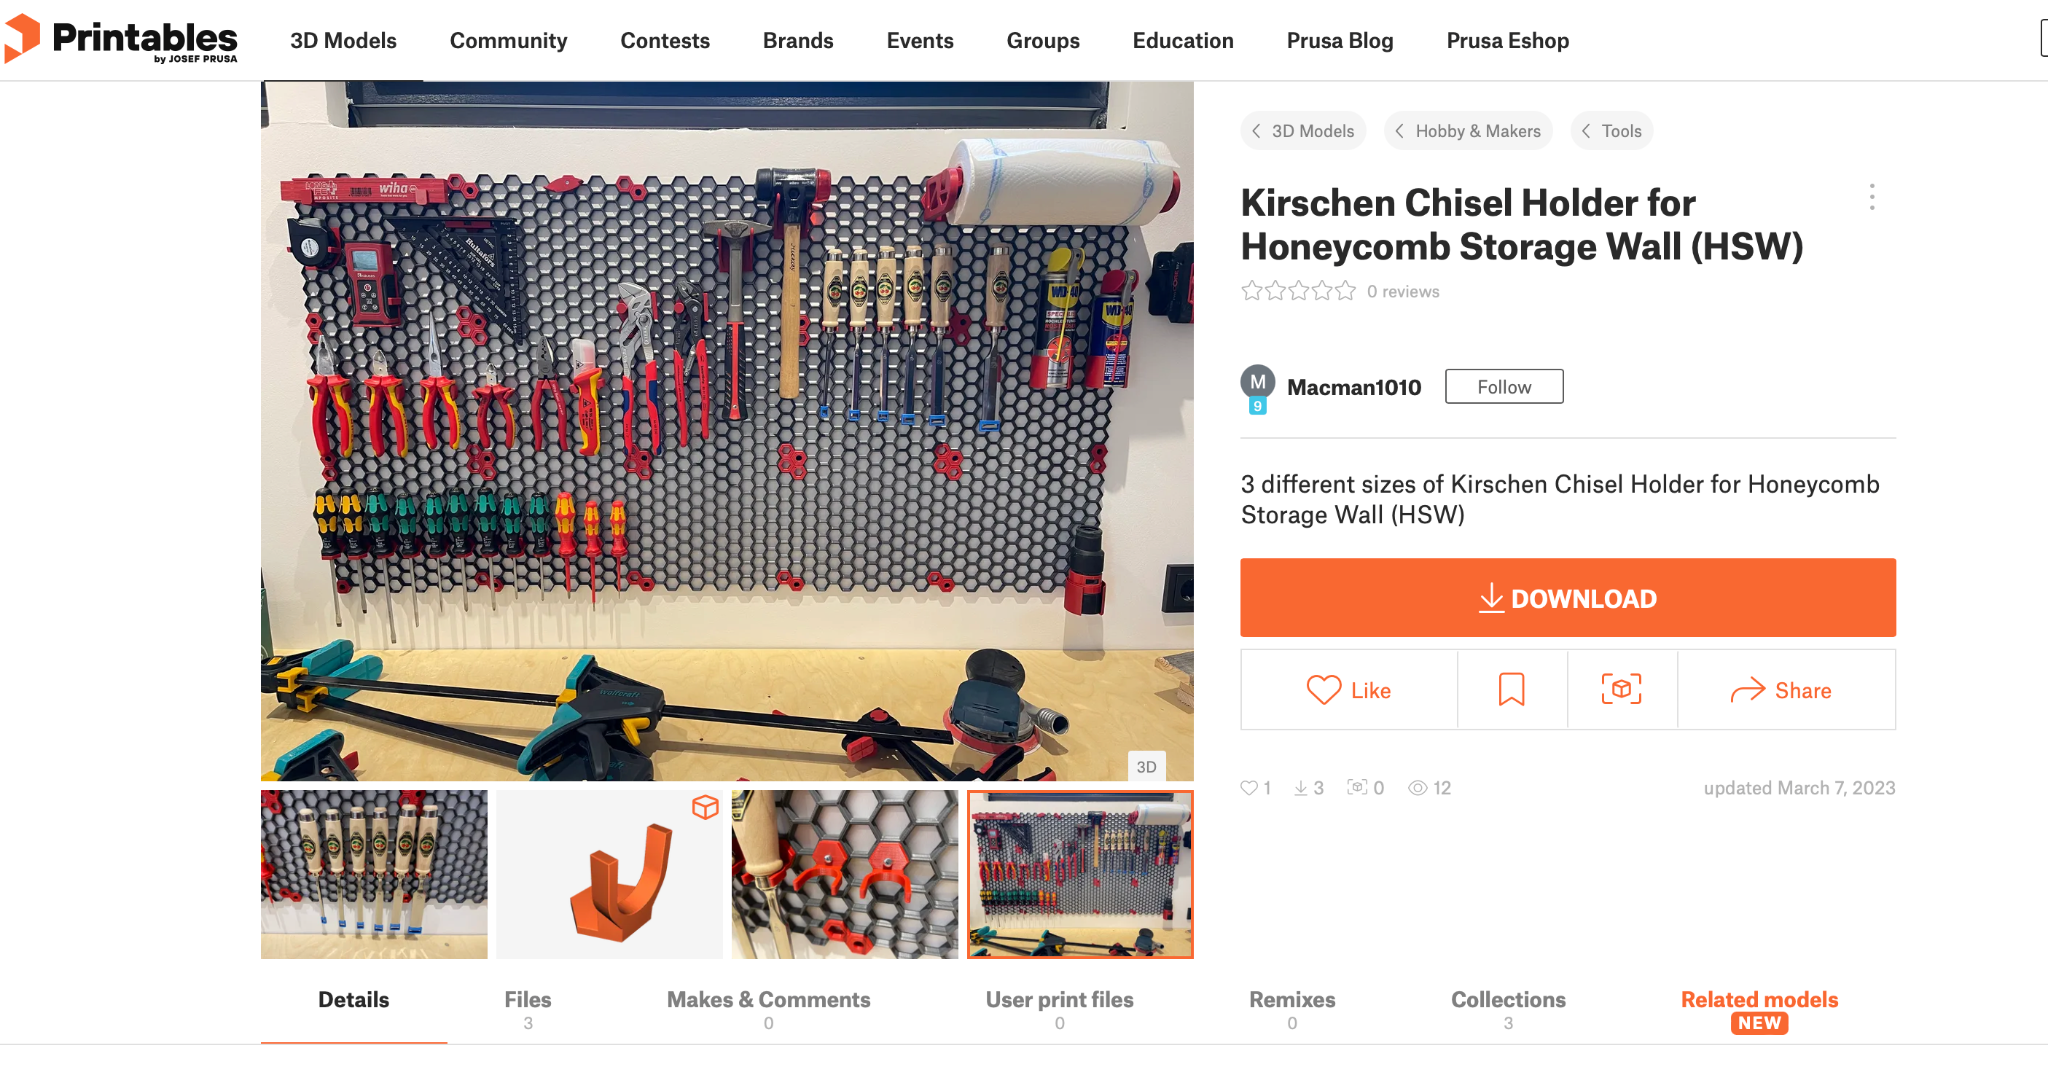
This is probably my #1 most popular question on the channel: “did you print your tool wall?” The answer is YES, and I did it using the honeycomb storage wall standard by RostaP.

Like all the other prints on this list, this is a standard, which is used not only to provide models, but also tools that you can use to generate your own models, such as openscad files, and more.
This community is much less developed than gridfinity, though, so I did go ahead and create a subreddit where we can share models and builds, which I’ll link in the description below.

Here again, there are a few things to look out for before you hit print, or rather, before you install these.
First of all, they need to be mounted in a specific way. Not only do you need to mind the rotation of them – making sure that the aligned points of the hexagons are on the Y axis, but also, there is a front and a back!!! Throughout the process of installing the accessories on the wall, I had no idea why nothing would go in well enough. I would have to hammer things in, glue them, and generally break half of what I was trying to put in.
It was only then that someone online pointed out to me that there’s a front and a back – and that I had mounted them backwards. This meant that the little friction tabs were being depressed immediately when I tried to put in inserts, and that there was no edge for them to catch on once fully inserted.
So, I’m going to have to re-do the entire thing again. So that’s fun. And it’s what happens when there isn’t a community available, like there is with Gridfinity, to check in and ask questions.
If you look at a lot of the examples of HCW installations in the makes tab on Printables , you’ll see that most people use the HCW system for relatively small, flat things like pliers and remote controls.
But personally, I like to use it for the “big” stuff that doesn’t fit in a drawer or cabinet, but which I need to have readily available.
With various attachments already available, including hooks that are reinforced by metal hardware, as well as the option to design your own solutions as I have for things like cold-shoe mounts, the possibilities are endless, and you don’t need to worry about putting a reasonable amount of weight on these bad boys.
I said reasonable people. don’t blame me if you get a concussion or worse because you decided to mount 1kg spools of filament or your laptop from a plastic hook a few millimeters thick.
And please, do remember to use the proper hardware, either concrete or drywall anchors to adhere the honeycombs to the wall!
By the way, one cool thing about this system is that you can make it modular – as long as you mount things correctly.
That means that you can unclip something from the wall, and move it over to other walls, or even onto your shelf brackets – if you download and print these ones I designed, which feature double-sided honeycombs.
Catch-All Trays
By HD
Remember earlier, how I said that Gridfinity is not really ideal for “bigger” things, or things that don’t require a specific, customized slot?
What, then, do you do if you just want a series of larger trays that can hold different things at different times?
Fortunately, I recently discovered these catch-all trays by HD.
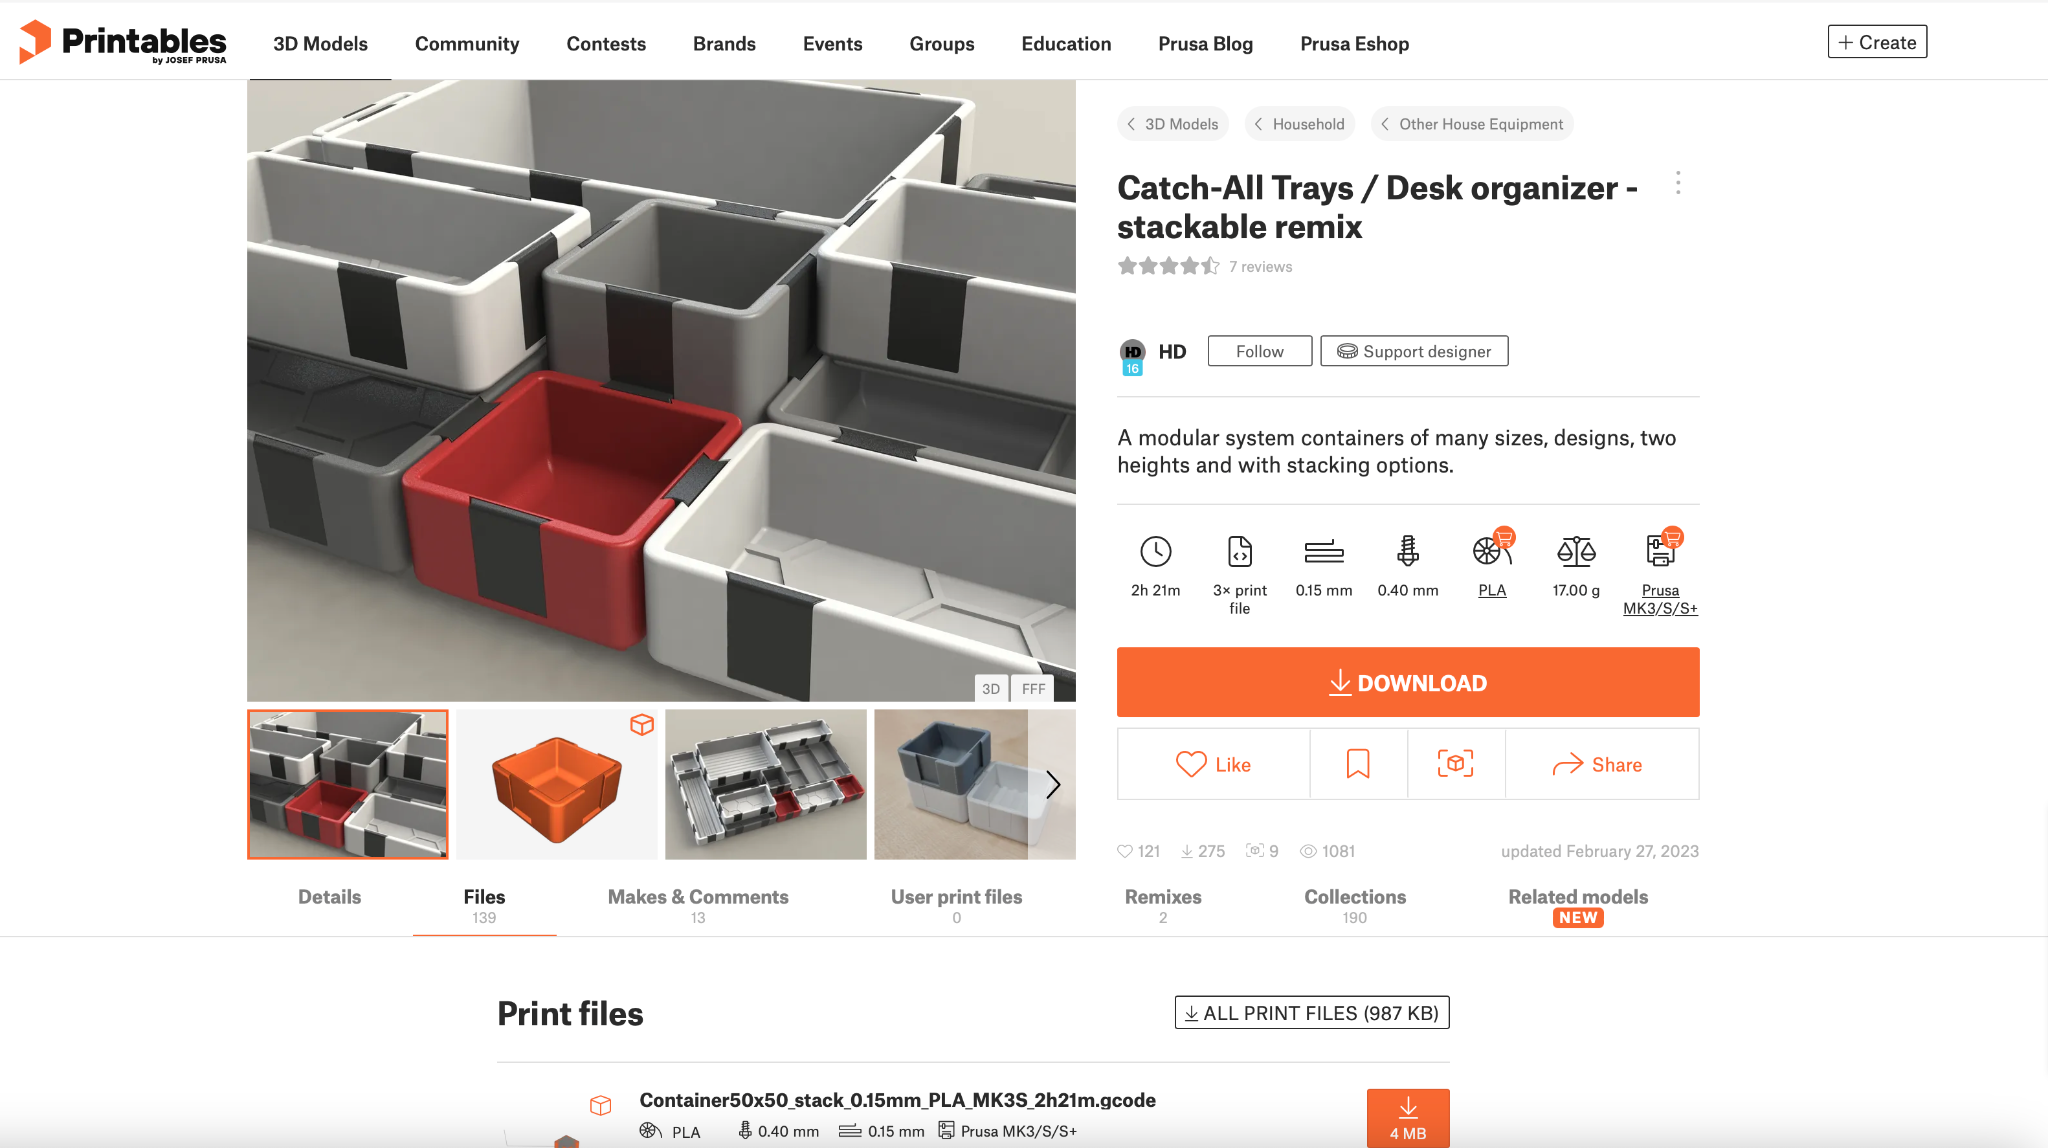
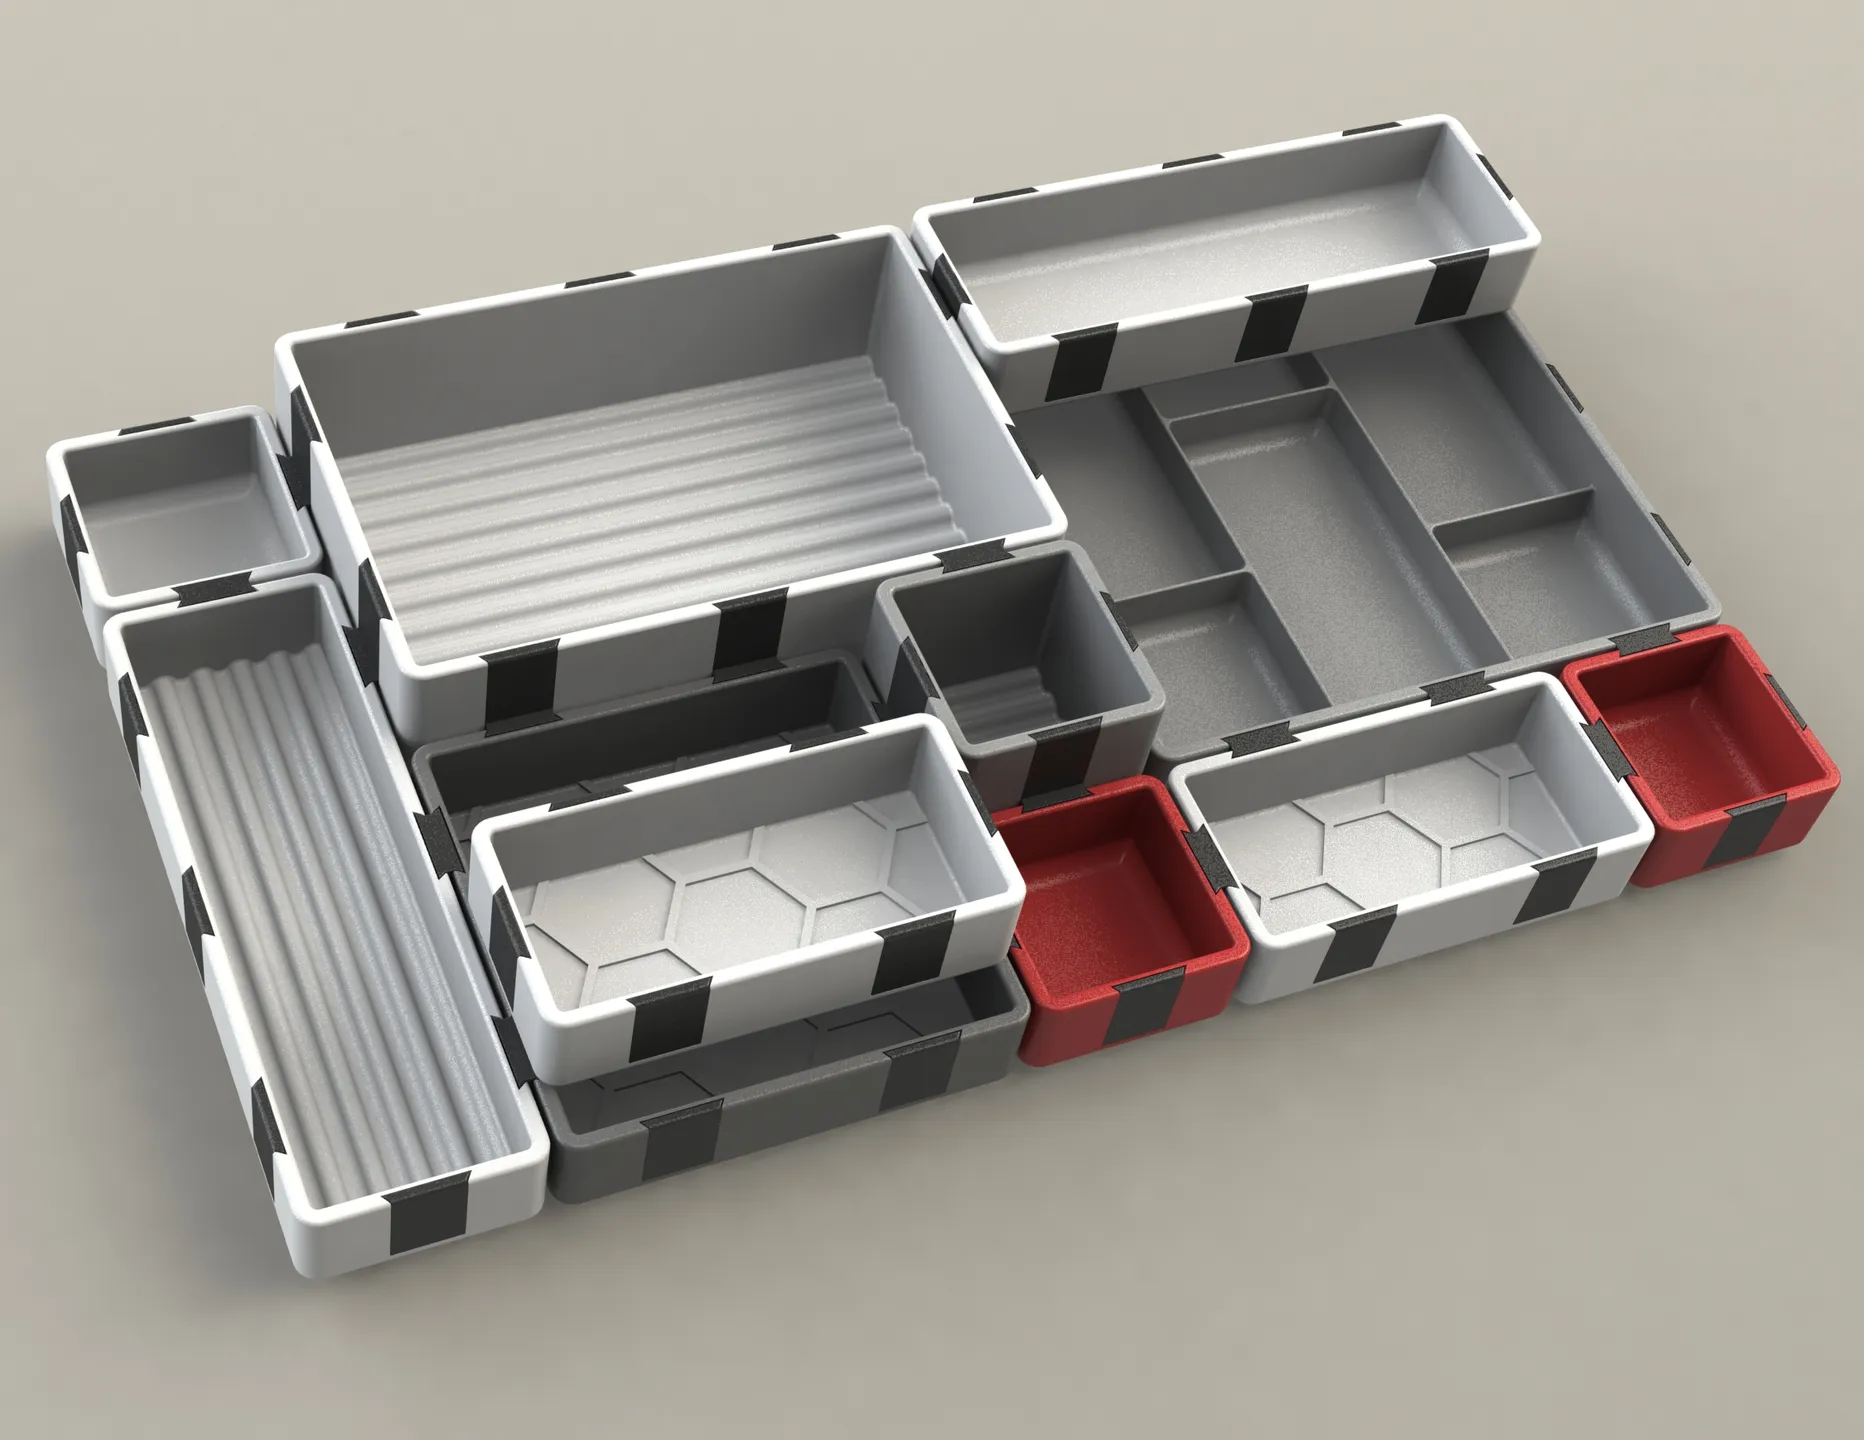
Like Gridfinity, they come in standard sizes, in this case increments of 5cm, with various different patterns for the bottom surface.
But unlike gridfininty, they feature thicker walls, and the ability to connect bins to one another.
This means that they can be connected semi-permanently to one another to create a customized tray you can carry as one unit – and unlike Gridfinity, there’s no baseplate left behind, and no risk of the bins coming apart.
On that note, a word of caution here.
There are various sizes of both the connectors and the plugs – though I didn’t use the plugs at all, because I like the look of the grooves.
Depending on how tight you want the fit to be, and the tolerances of your 3D printer, you can choose how securely you want the bins to be connected.
Because my intended use for this system is to have one single unit that I can use to clear off everything from my desk when I want a larger workspace, I opted for the tightest ones.
That way, when I pick up the entire unit, I don’t have to worry about the bins detaching… whereas, if I want to change the layout in the future, I still can, by exerting force. Additionally, you’ll want to note that after asking HD via private messages to update the design, the newest version of the bins makes them stackable, so you can optionally make a bottom layer of fixed bins, then stack a second layer of removable ones.
If you’ve already printed out the old versions, not to worry – the new ones will stack on top of the older ones.
Conclusion
So there you have it, my top 4 systems for organizing everything in my life with 3D Printing.
I’ll be honest; my office is still a disaster 80% of the time, but that’s a different issue for a different time.


