In this guide, I’m going to share with you how I built the single most mechanical, functional, and HEAVY 3D print I’ve ever done, as well as many of the mistakes I made, the lessons I learned, and how they can help YOU improve YOUR future 3D prints going forward.
Background To The 3D Printed Camera Crane Project
To the uninitiated, 3D printing may seem like a.. Well.. “not so serious” manufacturing method… in the best case scenario, people think, it can be used for prototyping before “real” manufacturing can take place…
More realistically, most people probably take a look at the types of things on Printables.com, Thingiverse, etc, and come to the conclusion that 3D printing is mostly just for printing silly little fidget toys, decorative plastic junk, and parts for your 3D printers.
But recently, I saw an awesome video by Alexandre Chappel, where he saved $10,000 by building a heavy-duty camera crane instead of buying it, allowing him to quickly and easily capture ANY angle and shoot much higher quality footage with MUCH less effort as opposed to using a tripod.
And it seriously inspired me to re-imagine what is possible with 3D printing.
I’m really lazy, and although I have tons of high-quality videography gear, I usually don’t go through the effort to take beautiful B-roll, simply because it’s a huge hassle with a tripod or gimbal.
Now, unfortunately, unlike Alexandre, I don’t have a huge workshop where I can roll around a 7 foot tall dolly, and I also am not a trained industrial engineer, so designing my own, at least until I get better at Onshape, was out of the question.
Choosing A Build & Sourcing
Fortunately, I went about searching the interwebs for something that could serve a similar function, and discovered that popular designer and YouTuber Mechanistic had already designed a compact, multi-functional camera jib for exactly this purpose.
The jib was broken down into small enough pieces that anyone can print it – even on an Ender 3 .
Best of all, there was a 40% sale going on on MyMiniFactory, so the plans only cost $20 or $25.
I scooped them up, dove into the Bill of Materials, and because I’m both cheap and based in Israel, where everything is insanely expensive, I went about ordering all of the mechanical parts on AliExpress, as well as some additional filament from my favorite brand, Overture, on Amazon.
I also picked up some “Prusa Orange” from a company called Ataraxia, but as you’ll soon see, the color didn’t match the more recent color of Prusament – which was kind of a bummer.
I used mostly PLA, though some parts I printed in PETG, either because the BOM specified it, or because I wanted to make progress in printing while I waited for stuff to arrive in the mail.
All in all, including filament and hardware, I think I spent roughly $200 on this project, which is a bargain considering similar products cost 10 times as much online.
AliExpress took longer than usual, and so I had a lot of time to print the parts… and print the parts I did.
For about two weeks, I had both my Creality CR-10 V3 and my Prusa MK3S+ working full-tilt, printing either parts for this jib, or gridfinity bins to organize all the nuts and bolts when they arrived.
Mechanistic did a really good job of specifying all of the settings for printing, like infill, perimeters, suggested color, and layer heights, though I had to ask him to post one unified sheet that outlined all the information on one page, rather than two different reference sheets to cross-check.
Originally, I had planned to use the “small” weight box, and fill it with sand – and I really wish that I’d read the instructions more carefully… because as you’ll see, getting enough weight for this thing was going to be a major problem down the road.
Mechanistic also did something really smart, in that he provided quick-printing “fit templates” for all the parts that required exact fits.
This meant that I could save a TON of filament, but it also meant that I couldn’t finish printing all the parts until some crucial components like bearings arrived…
Finally, nearly all the parts arrived at the same time, and I tore into them like a spoiled kid on Christmas.
I was really glad that I happened to record the “unboxing” of all of the materials, because some ballsy and unscrupulous AliExpress seller decided to send me 3 pieces of carboard instead of the most expensive – and important – part in the BOM… the 700mm steel rod.
Fortunately, I was actually able to not only get a full refund from AliExpress, but also source a 1M rod locally, and even with express shipping, it ended up being cheaper. There might be a lesson here… If a package from AliExpress feels fishy, film yourself unboxing it!
With all the parts now at my disposal, I went about printing the test prints, and then, once everything was all good, printing the final bits. Now, time to assemble!
Full Assembly of The 3D Printed Crane
My wife gets really upset when I take over the living room with my messy projects, so I decided to set up my workstation outside and enjoy the summer breeze a bit.
On that same day, I called over my friend and trusted AC technician Yoni because our AC was acting up, and he was so enthralled by the project, he decided to hang out for the day and help me with assembly.
This was really cool, because ever since I met him and we bonded over our passion for making, we’ve been saying we should hang out and build something together, and this gave us the opportunity to actually do it. Thanks so much for your help, Yoni!
We laid out all of the parts to get a sense of what goes where and make it easier for us to find the parts as we went along. Fortunately for us, Mechanistic provided EXTREMELY clear assembly instructions, step-by-step, with no question marks or unclear areas.
Assembling this thing was (mostly) a breeze, and the only problems I had were, of course, due to my own mistakes or bad preparation as a result of not reading the instructions clearly enough.
One mistake, for example, was that I ordered Nyloc M6 Nuts instead of Regular M6 Nuts. This may not seem like a big mistake, but oh, man… this was the mistake that just kept on giving.
Most of the important structures on this jib rely on M6 nuts to hold it together, and while some areas, like the core base, accepted the Nyloc nuts, other areas, where the nuts slide in from the side, most certainly did not.
To fix this, we had to get creative. We shaved off the lip on a bunch of M6 nuts to slide them in, and that was time consuming and frustrating, to say the least.
Even after doing this, we had to force the nuts in – and we had to get creative.
We tried heavy-duty clamps, pliers, pliers WITH heavy-duty clamps, vice-grip swedish wrenches, and when we got fed up with all of that, I took a cigar lighter to the plastic to soften it up before forcing the nuts in.
The lesson here: pay special attention to the exact type of nut you need, and don’t buy Nyloc when you need regular nuts!
Once my buddy Yoni took off, it got lonely working outside, so I recruited my special helper Ari to help me out with the assembly and keep me company.
To be honest, Ari was mostly focused on disorganizing all of my gridfinity containers and shoving M4 bolts into tons of little places I’d later have to dig them out of, but it was still nice to have company and someone to complain to when I ran into bumps along the way.
Because I didn’t get my 700mm rod from AliExpress, I ended up having to measure and cut the 1m rod down to size. This was no big deal with my diamond dremel wheel, and anyways, I expected to do a bunch of cutting, because the 3mm pins included in the bill of materials needed to be cut down to size, and then chamfered on the edges to make insertion easier.
Here, as always, safety was prioritized, so I sent Ari inside to be with mom, and I not only wore eye protection, but also ear protection.
As I cut the pins, the sun went down, so I got to take some cool footage of the sparks flying… check this out.
At this point, I got sick of feeding the mosquitos in the garden, and decided to take my assembly work inside.
With the base already assembled, the rest of the assembly involved inserting the steel rod into the main arm, and then bolting together the pieces of the arm to one another.
I then connected the pivot base to the arm, and that whole construction to the core post, which slid easily into the triangular base.
I then attached the camera pivot, opting for the reversed one because of how my desk is set up, and figured I was rounding home base as I went to mount the weight on the back.
But boy, oh boy, was I wrong.
You see, as I mentioned earlier, I didn’t carefully and closely read the instructions all the way through before ordering parts, and I had planned to use the smaller version of the box, and just fill it with sand or rocks, both to cut down costs and to be eco-friendly, since I have kilos and kilos of landscaping rocks left over from my garden.
But on closer inspection, I discovered that the average DSLR – without the hot-shoe base and heavy-duty boom microphone I like to use – requires a staggering 4kg of weight to balance out the arm. Naturally, the small box was not going to work – but that was no big deal – I just printed another one.
The big deal came in the fact that even 3kg of rocks wouldn’t fit into the box, and I needed more.
I wanted to use reclaimed materials, and so I took some spare tiles in the trash room of our building, and smashed them to smithereens. I carefully stacked the tiles into the larger box, using space as judiciously as possible, but I was only able to hit 3kg.
I then added sand to fill in the nooks and crannies around the tiles, and decided to give it a whirl.
Who knows, maybe my Panasonic GH5 was lighter than other cameras? I lined the edges of the box’s lid with silicone to prevent leaking sand, and went to mount it.
As soon as I flipped the weight upside down, sand started leaking out of the center holes, so I hot-glued them shut, which of course made it impossible to insert the bolts… so I put some silicone in 2 of the holes, and screwed the box on upside down to stop the leaking.
All that effort, however, did not pay off, because the 3-something kilos was simply NOT ENOUGH to balance the camera, much less all the accessories like lights and microphones I’ll likely attach to it.
Back to the drawing board. I went to the industrial part of town, and shopped around for ball bearings… but quickly discovered that 4 kilos of even the cheapest bearings would cost $146 – effectively doubling the cost of this project.
One really unfriendly seller even told me I could buy their junk and defective metal scraps that they were going to throw away… for $60.
Fortunately, I went to another store, which carries every type of bolt under god’s green earth, and explained the situation to them. I asked them to give me a box of bolts that they have no use for, or that they want to get rid of.
The first option was a longer screw, and I didn’t think it would fit in the box compactly enough to get to 4kg. So, we settled on some very small screws, and although the seller originally tried to quote me $120, I managed to negotiate him down to $29.
I’m still not happy about paying that much just for the weights, but at this point, my wife was getting really miffed at me having all of my tools all over the office and back yard, and I decided that $29 was cheaper than marriage counseling.
With the screws in place, I was able to assemble the arm, and move on to assembling the end effector and finishing touches. Because the camera was actually on the jib for this process, I didn’t get too much footage of it, but I assure you, you didn’t miss too much exciting action.
At this point, I realized that printing the knobs for the screws in PETG was not a good idea, because PETG is a little too soft.
I ended up reprinting those knobs, and that, friends, was another lesson: PETG does not withstand torsion, especially on sharp edges, as well as PLA.
So, if you need sharp edges that will remain sharp and grippy, such as for gears, knobs, and so on, choose another material!
Future Improvements
Let’s talk improvements.
First and foremost, I mounted the same type of quick-release camera mount on the jib that I use for everything, making it easy for me to switch from this jib to a gimbal or hand-held tripod and back.
After the final assembly, I realized that I could probably benefit from having a little more weight if I want to add on lights, microphones, and so on, so I might just re-open the weight box and add in some sand, or try to find some very small M2 nuts that will fit in the extra space between the screws.
Additionally, I failed to consider just how INSANELY heavy this Jib is with the camera, weights, and so on. I think it probably weighs more than 10kg, though I haven’t weighed it.
For this reason, I might decide to put some locking casters on it in the future, or maybe even build a waist-high dolly that I can attach it to to roll it around the house when I want to film in other locations.
If I do that, then I’ll really have all the benefit of Alexandre Chappels massive camera arm, without taking up all the space, and I’ll still have the option of dis-assembling it for use as a micro-desktop jib, which is what it’s originally intended for.
Also, and this is a piddly little thing, but when I’m using the jib with the reversed camera mount, I can’t actually use the swing-out display, which means I either need to connect it to my computer to see things like exposure and focus, or, I’m going to need to shave off the corner of this mount so I can at least somewhat fold out the screen. It’s annoying, but I’ll figure something out.
Overall Impressions & Lessons Learned
Honestly, when I look at this whole project, I am extremely satisfied with how it turned out.
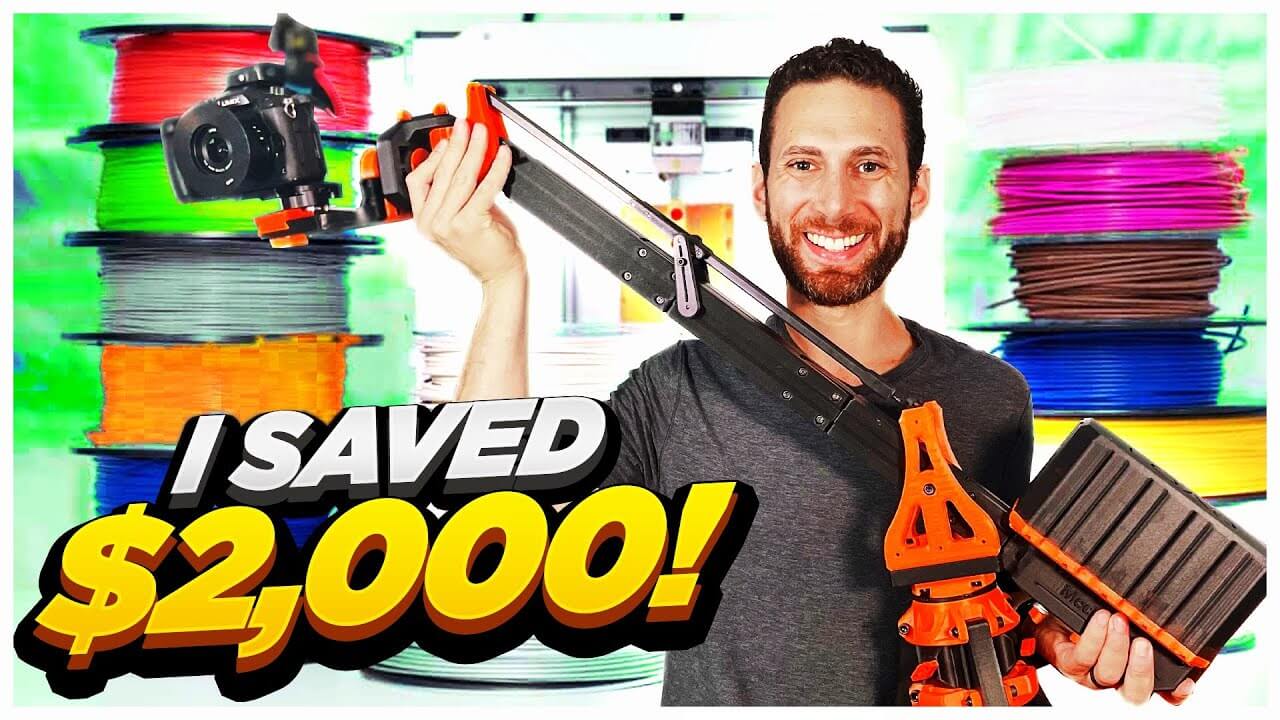
Not only did I potentially save over $2,000 over a commercially-bought product, but I got something that you can’t buy, which is more compact and more functional than any of the products I was able to find online.
Plus, it just looks AMAZING, with that orange and black theme – even if there are 2 tones of orange in there.
Best of all, if something breaks, I don’t have to worry about the availability of replacement parts – because I can just print them myself!
I also learned a lot as I went through this project. I learned that I need to temper my excitement to “just make stuff,” and spend a little more time going through the instructions and double-checking the parts that I order, and what is going to be needed.
As the saying goes, an ounce of prevention is worth a pound of cure, and I could have easily saved myself 3-4 hours of trimming parts, melting plastic, and haggling with local sellers if I’d just read the instructions more carefully.
But looking at the bigger picture, I think that this build gave me much more to me than just a camera crane that will make my work easier and higher quality.
Ultimately, this project inspired me to think even bigger when it comes to 3D printing. Like I said in the intro, it’s really easy to think that 3D printing is only good for octopus toys and organizer bins, but if this design does anything, it proves that that is simply not true.
When you combine 3D printing with readily-available, cheap parts like metal pins, bolts, nuts, and bearings, you drastically expand your capabilities and the range of applications.
If Mechanistic can design such a thoroughly functional, heavy-duty product with so many features, moving parts, and benefits over a traditionally-made product… just imagine what else could be 3D printed?
It really makes me want to level up my Onshape or Fusion 360 skills, and then look around my house and my life for other things that I could solve using 3D printing.


